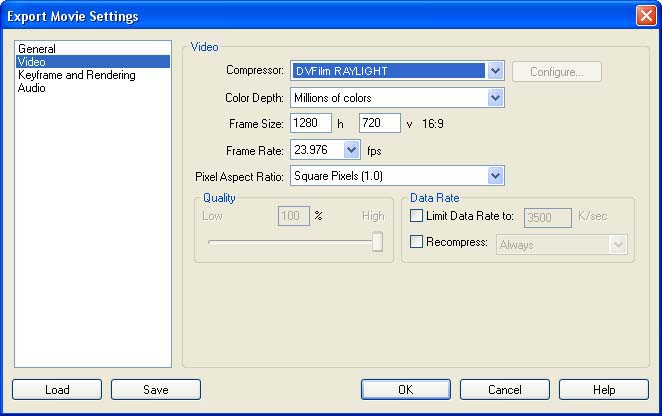
The first step is to export a raylight AVI of your completed movie
or scene. Use the following export settings in Sony Vegas, making sure they
match your project settings: Note: 1920 x 1080 24P and 25P movies are also acceptable. The frame size can also be 1920 x 1080, and the frame rate can
also be 30 or 25. Set Raylight Blue before starting the export. Note: 1280 x 720 25P, 1920 x 1080 24P and 25P movies are also
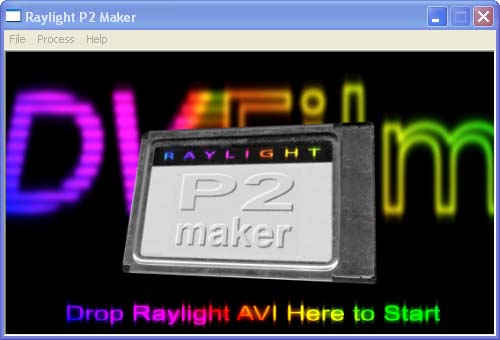
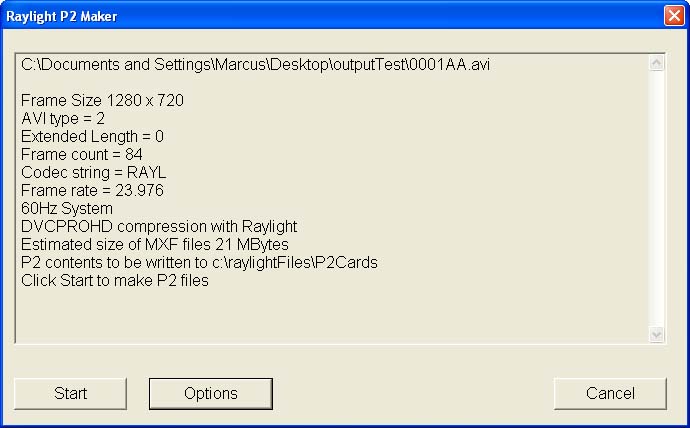
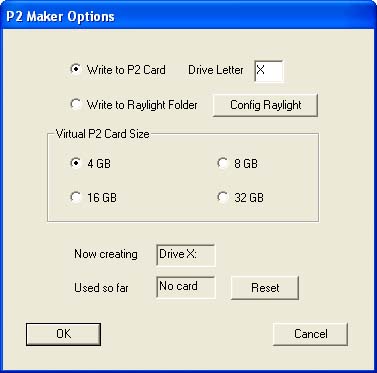
acceptable. Drop the Raylight AVI into the P2 Maker window. The P2 Maker Console
will appear showing some technical information about the Raylight
AVI movie file (see below). Write to Raylight Folder - use this option to write to a virtual P2 card contained in
the Raylight output folder's "P2Cards" subfolder. Click Config
Raylight to make sure the Raylight output folder is set correctly.
The card image can be copied to a P2 card later using Windows. Now creating - this diplays the current drive letter for the P2 card, or the
name of the virtual P2 card being created. Used so far - this displays the amount of storage used so far in the P2 card
or the virtual P2 card, in percent of the total capacity of the
card. Click Reset to clear the memory if you delete all the card images to start
over. Click OK to save your changes. If you are copying directly to the Camera, please read the section
below on sending P2 files to the camera. Then you click Start on the console to start writing MXF files to the P2 card. Note that 1080/24P movies are converted to 1080-60i format by
P2 Maker. The files created are: Refer to page 82 of the HVX200 Operator's Manual. You must have
Windows 2000 or WIndows XP and a working USB 2.0 port. Make sure
it is not USB 1.0 or 1.1, which will not work with the HVX200. Install the USB drivers that came with the camera. You can also
get them from the Panasonic website. With the USB cable inserted to both camera and computer, and the
P2 card inserted, turn on the camera and move the MEDIA switch
to P2. In the Menu, turn on the USB port option, (MENU, OTHER OPERATIONS,
PC MODE = USB DEVICE). Press the MODE button to light up the MCR (Memory Cassette Recorder)
lamp and hold it down for 2 or more seconds. The PC Mode lamp
should then light up. DEVICE CONNECT will show on the viewfinder and stay there until
the camera is turned off. In the Windows Desktop, open My Computer and the P2 virtual disk
drive which will appear. It can be helpful to use the Control
Panel / System Administrator functions to assign a special disk
drive letter to the P2 card, such as "P" for example, which will
remain consistent every time you use the card. After the files are copied either by dragging the CONTENTS folder
of a virtual P2 card or by direct copy from P2 Maker, "Stop" the
P2 card drive from the Windows System Tray and turn off the camera.
Turn it back on and switch to MCR mode to access the thumbnail
display. Each file will show up as an icon in the thumbnail display. Playing Back the Files Even though you will not be recording now, the camera must be
set up in a recording mode that matches your clips that you want
to play back, in order to play them back correctly. To properly play back 24P clips, make sure the camera is in the
720P/24PN recording mode (MENU, RECORDING SETUP, REC FORMAT, select
720P/24PN. Select 30PN if you shot and edited at 30P. To properly play back 1080/24P clips, select 1080i/60i. Dubbing to MiniDV Refer to the HVX200 Operator's Manual on setting up the camera
to dub video from the HVX200 camera to the built-in MiniDV video
deck. There are settings for 24PN and pulldown conversion which
need to be set up for proper operation (see page 86).
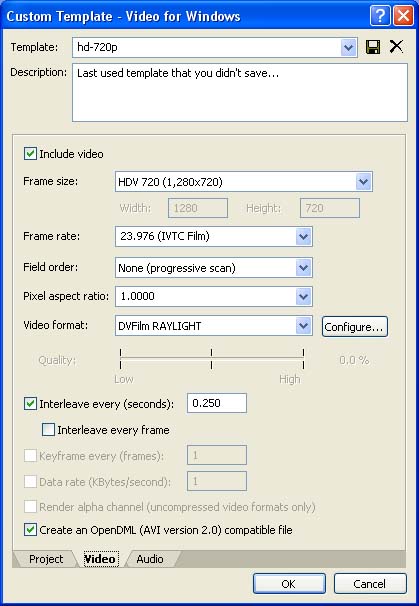
Set Raylight Blue before starting the export.
In the Audio tab, select 48000 Hz sample rate, 16-bit, stereo.
How to Send P2 Files to the HVX200 and Play Them Back